Custom markers that you can see in my video guides are provided by overlay applications - Guild Wars 2 Tactical Overlay (TacO), or BlishHUD. This guide will show you how to use my ALL-IN-ONE MARKER PACK with the GW2 TacO. If you are looking for the BlishHUD Installation Guide, Click HERE.
VIDEO GUIDE DOWNLOAD GW2 TacO Download All-In-One Marker Pack
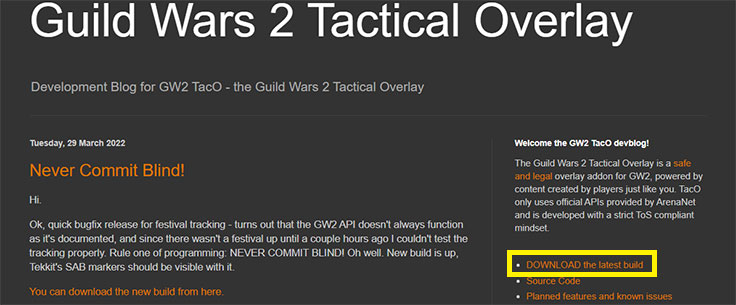
- Download the latest version of the GW2 TacO from its website.
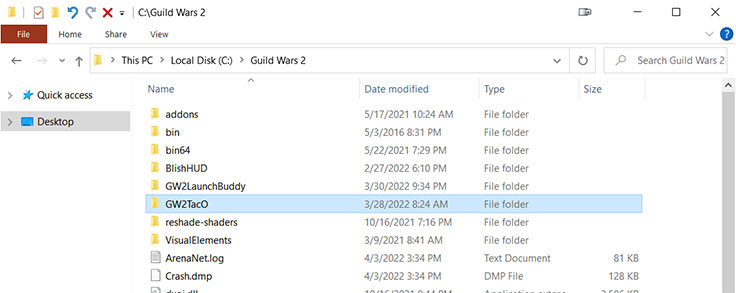
- Extract GW2 TacO from the archive somewhere - I recommend Guild Wars 2 folder. You can put it anywhere, however, if you don't have admin rights on your PC user profile, the app may not work properly if placed in system folders like Program Files.
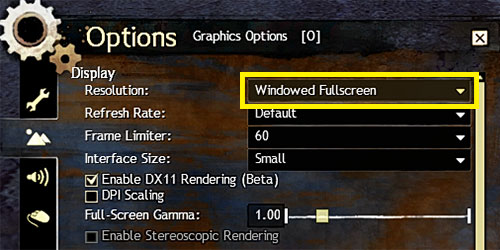
- Launch the Game in the Windowed Fullscreen mode, before you launch the app itself. With other modes may appear some issues or the app won't show at all.
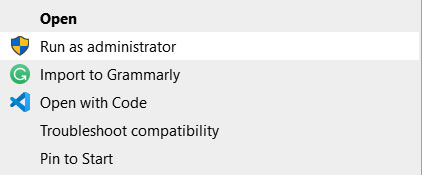
- Run the app as the Administrator, otherwise, some features may not work properly.
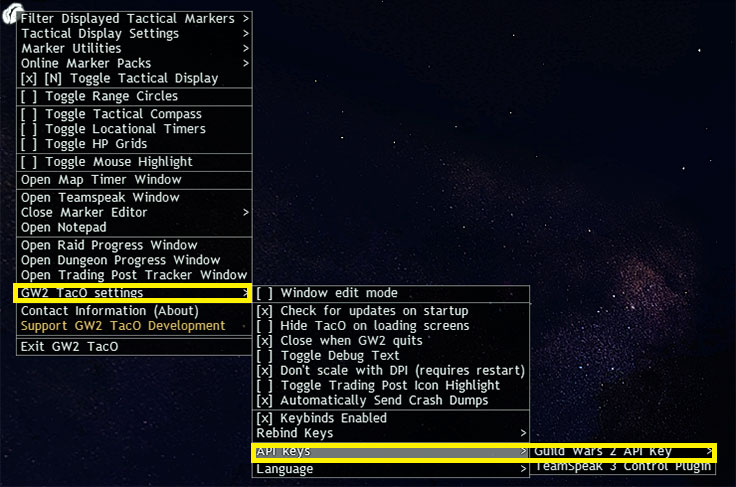
- Click on the GW2 TacO. taco-like icon, next to the Game menu.

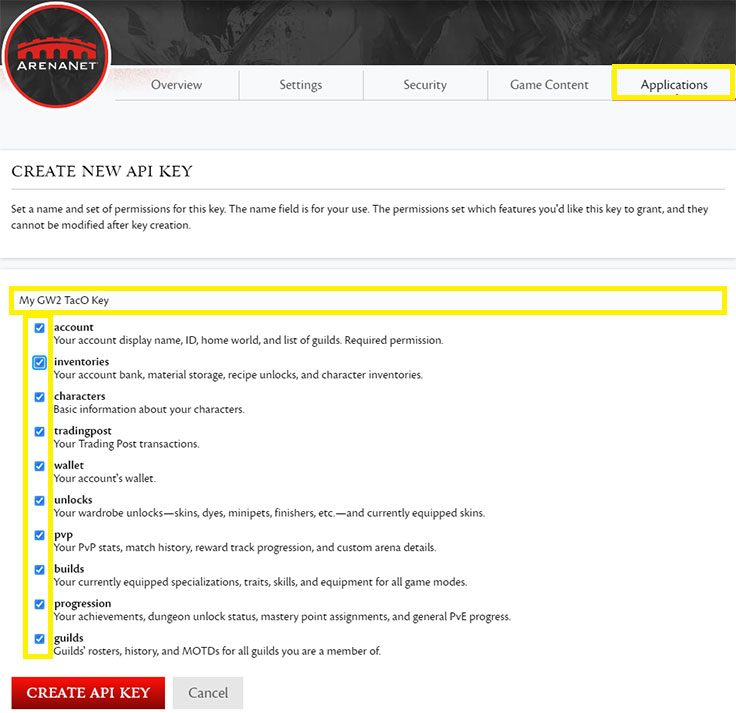
- OPTIONAL - Navigate into the "GW2 TacO settings -> API keys -> Guild Wars 2 API key", and add your API key there. You can create the API key at the Official Guild Wars 2 Website -> Account - Applications tab. GW2 TacO key requires only Account and Progression checkmarks. However, I recommend checking all of them to avoid possible future incompatibility in case some new features are added. This step is optional and the marker pack will work without the API key with its built-in behavior system.
- Navigate to "Online Marker Packs", and select "Tekkit's All-In-One". Also, don't forget to select the "Update Marker Pack Automatically" checkmark, so you don't have to take care of marker pack updates in the future.

- MANUAL INSTALLATION - In case the previous step didn't work, or you wanna use the Beta version of my pack. Download the ALL-IN-ONE MARKER PACK from the Download section, or in the case of the Beta version, from the #all-in-one-updates channel at our Discord server. Move the downloaded tw_ALL_IN_ONE.taco file into the "YourTacOFolder\POIs" (do not unpack it!). Override if asked.
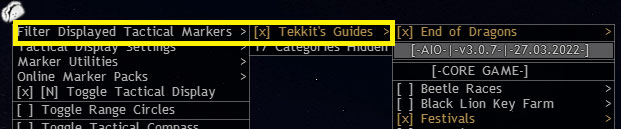
- You can toggle my markers by clicking on the taco-like icon, next to the Game Menu followed by Filter Displayed Tactical Markers -> Tekkit's Guides ->
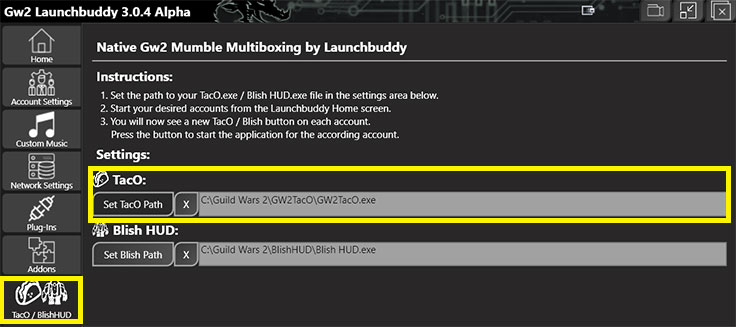
- If you use LaunchBuddy, set the path to the GW2TacO.exe in the TacO/BlishHUD tab, and then launch it with the Golem icon in the Home tab after you launch the game.